
Project Review
Time to work: 2 hours
Tomorrow: 10 to 11 hours (including soaking time)
The level of skill: Preliminary
Estimated: Less than $ 8
Before you start
Before cleaning your oven for the first time, consult the manufacturer’s instructions for cleaning. Some parts of the oven, such as racks, gaskets and door glasses, may need special care. Always remove loose debris before cleaning the cleaning. It is also a good idea to spread the newspaper in front of the oven to catch drip and food particles.
How to clean the oven without an oven cleaner
Some home cooks wonder, can you use an oven cleaner on the electric oven? In some cases you can do, but a better question is, do you really want to clean the oven that they are uncertain in cutting through grease and baked onset, but the very chemicals that make them so powerful also make them potentially harmful. Commercial oven cleaners are extremely alkaline and caustic. When breathing, smoke can cause irritation, cough, and shortness of breath, and can cause skin contact and irritation. When you can have a shining clean oven without doing so, you and your family do not need to expose these health risks. Here is how to clean the electric oven here, using the household products you have.
The domestic oven cleaners connected with pantry staple are cheap, natural and safe, and they can be very effective. It is important to note that you should use different methods of different parts of the oven:
- For the oven rack: You will need a box of baking soda and a white vinegar bottle. (You will need enough baking soda to spread a ⅛ inch layer on oven racks.)
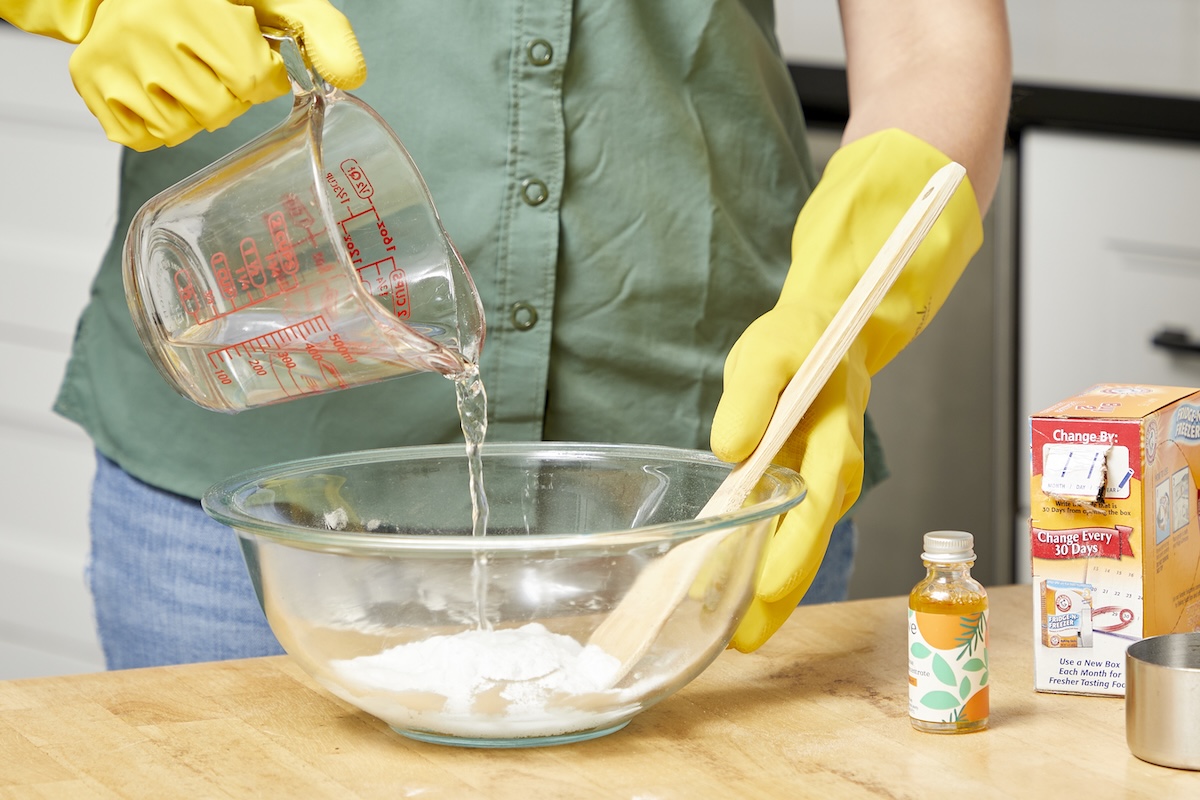
- For the walls of the oven, the roof, the floor and the door of the door: In a large bowl, 2 cups baking soda, 3/4 cups of water, and if the scent were is desired, 8 to 16 drops of essential oil drops to make a spreading paste.
Step 1: Start with a cool, empty oven.
Before manually cleaning the electric oven, turn it off and let it cool completely. Remove any pan, utensils and oven racks so you can easily access the roof, floor and walls of the unit. Use a spatula to slow down any debris or loose foods from the oven chamber.
Step 2: Consult the manual manual to clean the recommendations, and follow them on the letter.
Read your oven manual to find out which ingredients can be safely cleaned without damaging. Generally, be clean from the heating elements. Cleaning them can cause abrasive or, if it is still hot, they can become sparks or flames. Similarly, take care of the elastic gasket located in the interior of the oven door, which prevents heat from avoiding. Avoid cleansers on the gasket, and never clean it. In fact, many manufacturers clearly state that you should not clean the gasket, which is another good reason to consult your manual.
Step 3: Cut the cleaning time through Pressoking The ingredients of the oven
Save the elbow grease by applying your DIY cleanser to the individual oven ingredients and letting them away. Doing so will reduce Graem and later reduce the need for heavy duty scrubbing. Therefore, apply gloves and apply cleanser to the following ingredients:
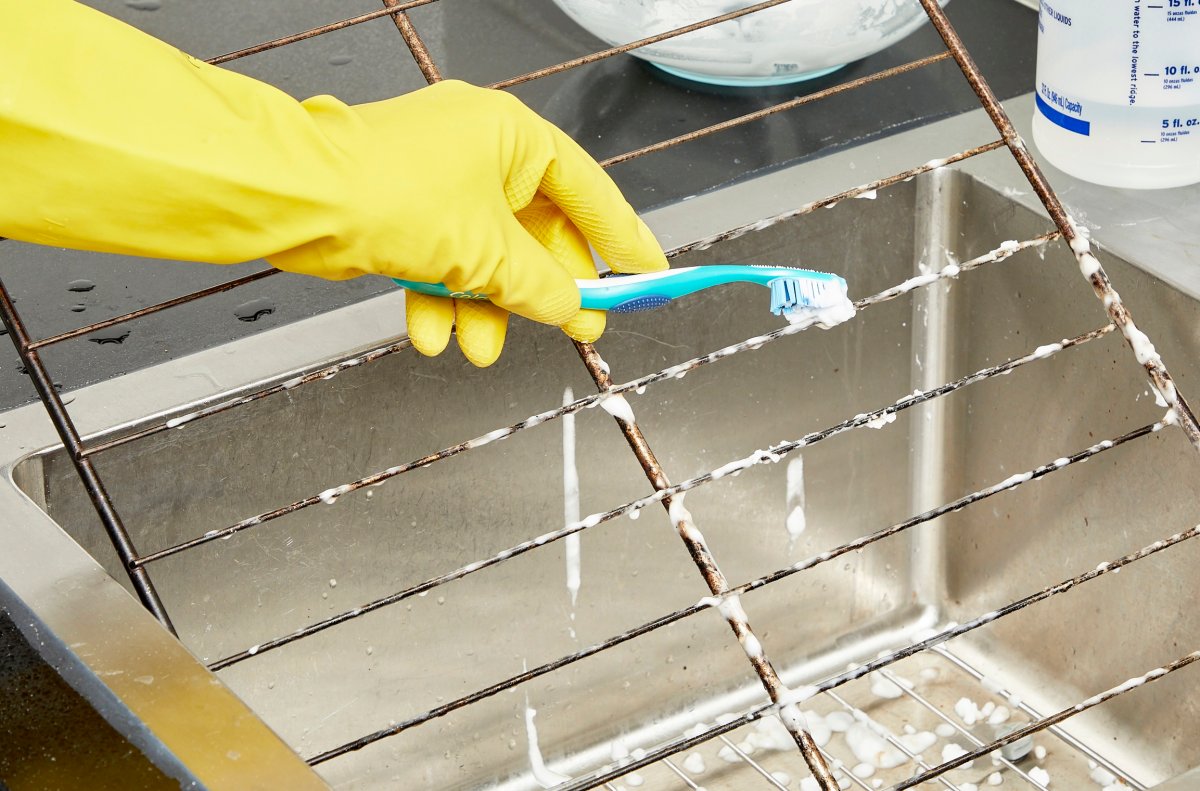
- For the oven rack: Place the rack in an empty bathtub or a large kitchen sink, sprinkle each rack with a 1/8 inch thick layer of baking soda, and then spirits with vinegar with a spray bottle. When the baking soda stops from foaming, fill the tub or sink the rack with enough warm water, then let them sit overnight.
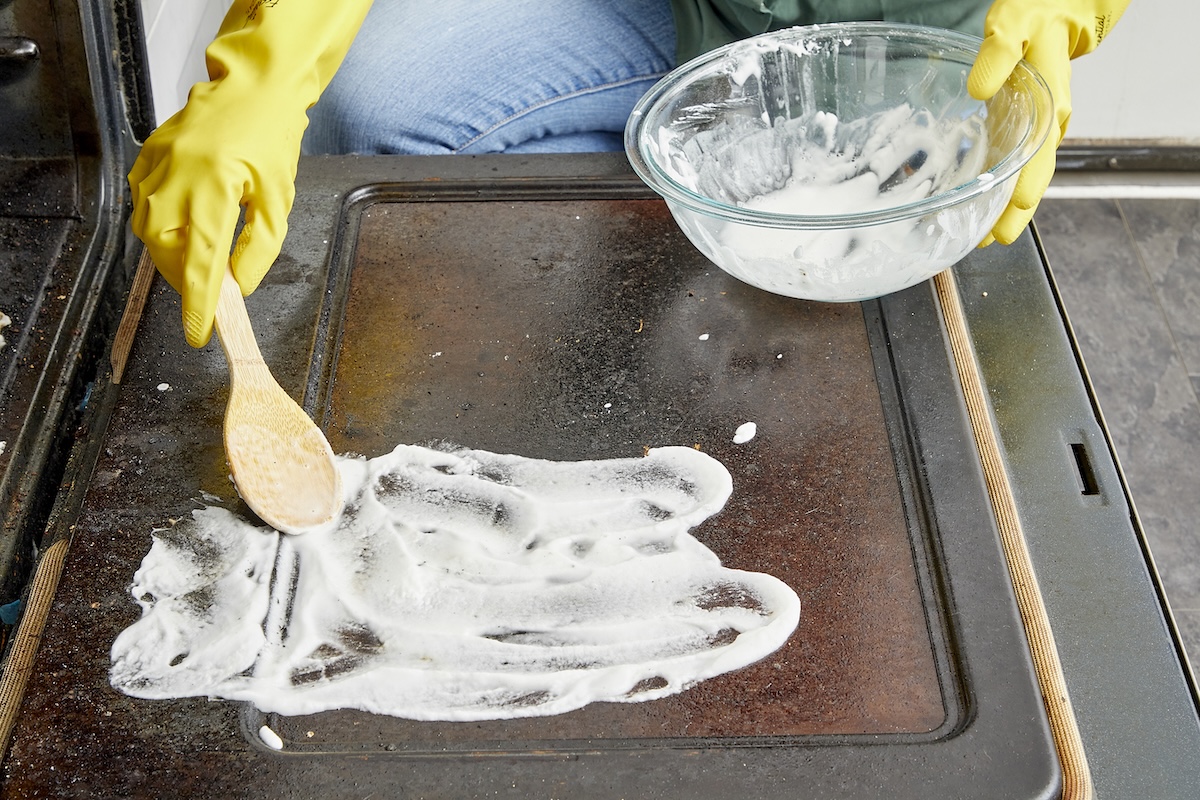
- For the interior of the oven: Wearing gloves, spread the home oven cleaner to all interior oven surfaces, just avoid heating elements. Let the baking soda paste sit in the oven for 6 to 8 hours.
- Glass of oven door: Spread the household oven cleaner equally on the glass on the inner part of the oven door. Allow him to sit for 15 minutes.
Step 4: Carefully clean each oven component.
After presenting each component of the oven, you will need to use a slightly different tools and vision to clean up everything. Start with the oven glasses, the surface that requires minimal soaking time, then move towards the oven chamber, and end with racks.
- Glass of oven door: Use a damp micro -fiber cloth to wipe loose gram. ۔ Wipe in just one direction to ensure a Streak -free brightness.
- Oven Interior: Using a damp sponge, wipe the side walls first and then the rear, work from top to bottom so that ash and debris fall to the oven floor. Wipe the top and bottom of the chamber from the front. Rinse the sponge with clean water and repeat until the baking soda remains, then wipe dry.
- Oven rack: Remove the tub or sink, and clean each rack with a brush or sponge to remove grease and loose rubble. Rinned and dry the rack before returning to the oven.
Once you clean the interior of the oven, you have finished the most difficult part of the job, but you haven’t been yet. Finish these quick tasks:
- If there is a drawer beneath the oven, whether it is warming drawer or just for storage, clean or empty a loose debris for space. Then, with a damp vein or sponge, remove the entire basket.
- Clean the outer part of the stove using vinegar and hot water solutions or just hot, soap water. (As usual, check the manufacturer’s instructions for the recommended cleaners.)
- Remove the nubs of your stove, clean them with warm, soap water, then dry and replace them.
Now that your stove is clean in and out, you immediately immediately without worrying about toxic remnants or unpleasant smoke from commercial cleaners. Can go back to cooking.
Cleaning points for electric oven
Cleaning the oven is probably not a favorite job, but you can take steps to make this inevitable task easier and faster. Make your cleaning system easier by following these points:
- Fresh sprinkle immediately deal with. When it spreads, they spread, and from time to time remove the wandering pieces to reduce the unpleasant burning odor.
- Stop the spill before they have happened. When appropriate, use a lid or foil to cover the cockware. When baking pie, casserols, and other notorious dry foods, place the pan on a baking sheet to collect the spill.
- Use baking soda to prevent smoke from spreading fresh oven. When you are making food, if the liquid or the food is spread in the oven, put it on the oven, open the oven door, and sprinkle the baking soda directly on the spill to prevent smoking. If the spill is not readily accessible or if the burning remnants are already causing the oven to smoke, then turn it off and let it cool completely. Then, open the oven door, remove any debris from the oven chamber, and remove the remains with a sponge moist with soap water.
- Never use aluminum foil to protect your oven floor. Many people eat the bottom of their oven with aluminum foil wrap so that they can catch food pellets and stop the stains. Don’t do that! Aluminum foil can prevent heat or heat in both electricity and gas, causing less cooked or more cooked food. Even worse, it can melt the oven and permanently damage. Instead, the chefs who are wondering how to clean the bottom of the lightning oven should consider keeping a fiber glass or other heat -avoiding material on the floor of the oven (such as, grill magic oven liner). As long as you position them so that they are not touching the heating elements, these mats offer more heat resistance than the foil and have safe options to protect your oven.
Niggling tips for self -cleansing oven
The self -cleansing oven can be a huge convenience, but it also has special care needs. Cleaning of cycles works by heating the oven at a temperature of 600 degrees Fahrenheit. It burns extremely heat -collecting spills and grease spots, and turns them towards white ash, after which it can be easily erased.
Some websites also recommend not using a cleaning cycle, noting that high temperature parts can damage or eliminate it. Another negative aspect of the self -clean cleaning is that when the oven is heated during the cycle, it releases potentially harmful smoke. Due to these smoke, oven manufacturers’ guidelines usually recommend that you maintain good video ventilation when cycling, and always keep pet birds far away from the kitchen. (These smoke can be deadly for sensitive birds.)
Despite these defects, self -cleansing oven remain very popular and can be very time -consuming. Here are some tips for watching the oven that cleanses yourself and doing the best work.
Avoid the use of commercial oven cleaners on the self -cleansing oven.
These cleaner can damage the enamel coating within the oven. He said, if you buy an oven cleaner instead of making an oven cleaner, consult your owner’s manual for the recommended commercial products. Note that there are options purchased in the store with less harmful ingredients and without any funny smoke.
Do not use the Self -Clean feature before the guests are finished.
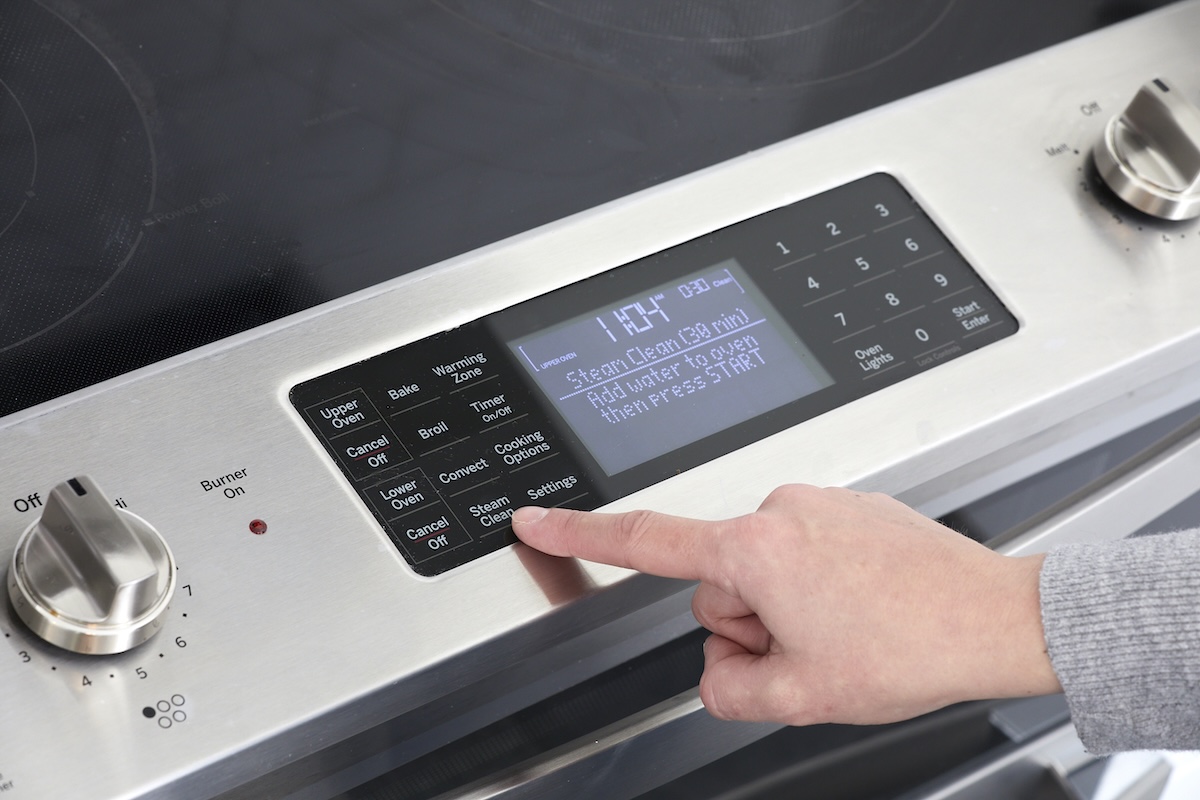
Occasionally manual scrubbing should mostly be enough to keep an eye on the oven, whether they are cleaning themselves or not, but from time to time you would like to run your oven through a complete cleaning cycle. The normal self -cleansing cycle lasts for 2 to 3 hours or more, and uses sharp heat or steam to burn grease and hard remains. When you use this cleaning function, be prepared for smelly, smoke -filled trials. If too much temperature increases, it is also possible that the cycle can reduce thermal fuses or burn the heating element. For these reasons, this is not a good idea to run the cleaning before your people are finished. Instead, use a self -cleaning function after a major event or several weeks ago, and avoid cycling more than 5 a year.
Always follow the manufacturer’s instructions to run a self -cleansing cycle. When the bicycle is completed and the oven cools, use a damp vein to wipe ashes and debris from the inner surfaces.

This is the year of kitchen renovation