
The drop zone is a fierce and relentless enemy of many home designers and parents. This area near the door is often the collection of backpacks, shoes, coats, sports equipment, and everything else dropped by our favorite humans as they cross the threshold of our shelters. As a designer, I have tried to conquer the drop zone over the years and have won some battles, but I have yet to win the battle. So when I came across Kirsten Brien’s hidden storage solution—which not only adds a layer of tick-away possibilities, but also hides some of the clutter of family life—I knew we needed to share her talents with other home enthusiasts.
“Hidden, dual-purpose objects have always been something I’ve been drawn to,” says Brian, designer and founder of interior design firm Pitmally House and manager of the popular @pitmly_house Instagram account. “After building it and seeing people, now I have a chance to try new things and really let my imagination run wild.”
And we are all lucky enough to witness his imagination at work. Here’s a closer look at how he created this project for one client and some top tips that can help make your hidden entryway storage goals a reality.
Assess the capacity of a space to meet your goals.
Never assume your home doesn’t have hidden storage potential. Most houses usually have possibilities. You may not have the same space as that 1980s laundry room, but you may have a nook under the stairs waiting to be used, space between some joists for a shelf or built-in cabinet, or an area above the ceiling drywall for a storage hatch between the joists.
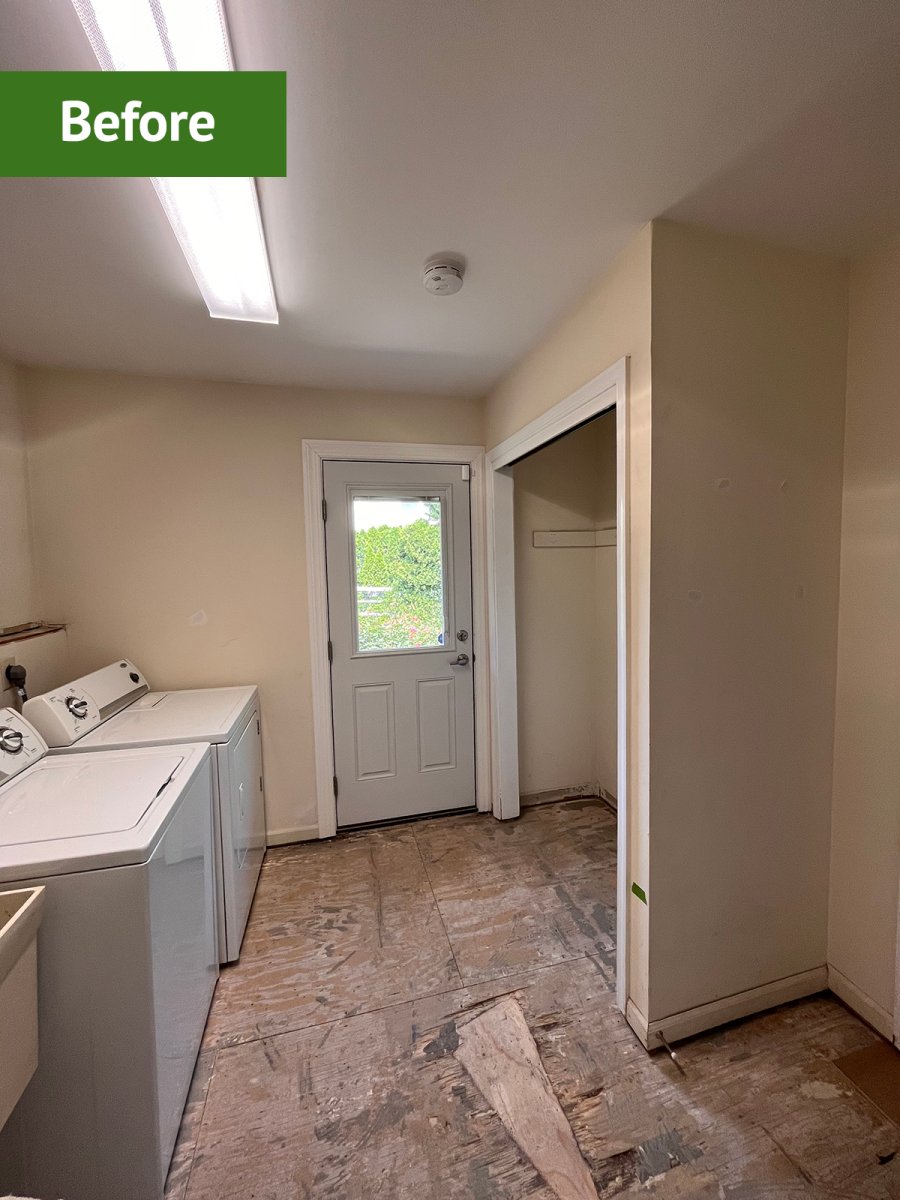
“When I went to look at the place, I told them not to clean and to please leave everything in the room where it usually lies,” Brian says. “The room was a laundry room with a sliding-door coat closet. They really wanted to turn it into a mudroom/laundry room that would hold the kids’ shoes, coats and backpacks.” And if they had cleared the space, Brian wouldn’t have been able to adjust the design for all the items that needed to find a home when the storage solutions were complete. “I always say that your collection of items informs the design scope required for a successful project,” he added.
“They really wanted a clean, organized space. That’s when I knew hidden dual-purpose storage space was perfect for them.” Brian says. “I will always keep the client in mind and what they need. At the end of the day, they will be the ones who see and use it every day.”
Break the project into smaller parts.
When there’s a project that consumes an entire room like this drop zone update, there’s likely to be a ‘where do I start?’ will emerge. As with everything in life, when a project seems overwhelming and too big to wrap your mind around, break it down into smaller chunks and treat each one as your own project with a schedule. It will be easy to manage.
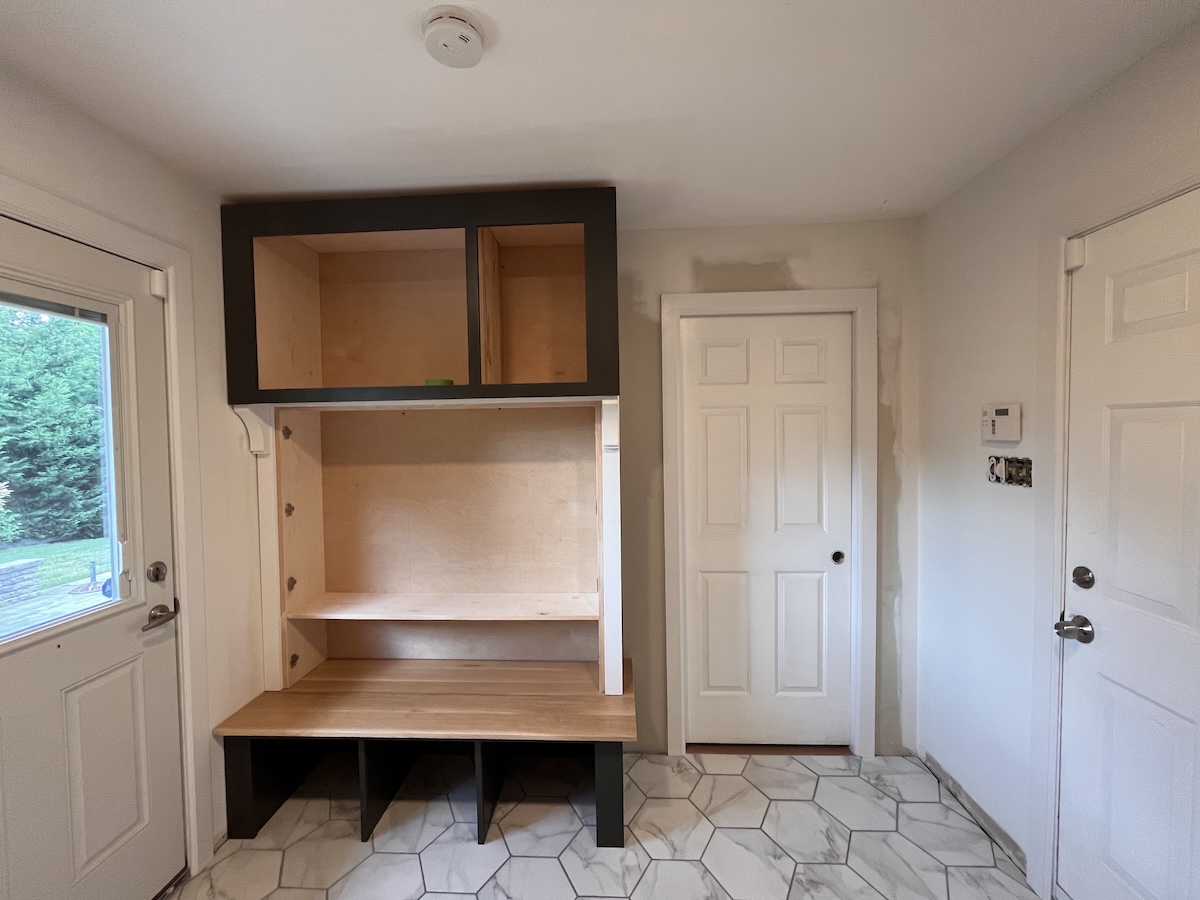
“Always break your project down. It’s a lot easier than it looks,” says Brian. “The construction is three different structures and it’s very simple. Below is a cube bench. In the middle is a shallow box cabinet with European hinges. Finally, there is a custom row of upper cabinets.” European hinges are concealed, two-part hinges that mount to the cabinet door and inside the cabinet, providing a clean look.
Think about the whole place.
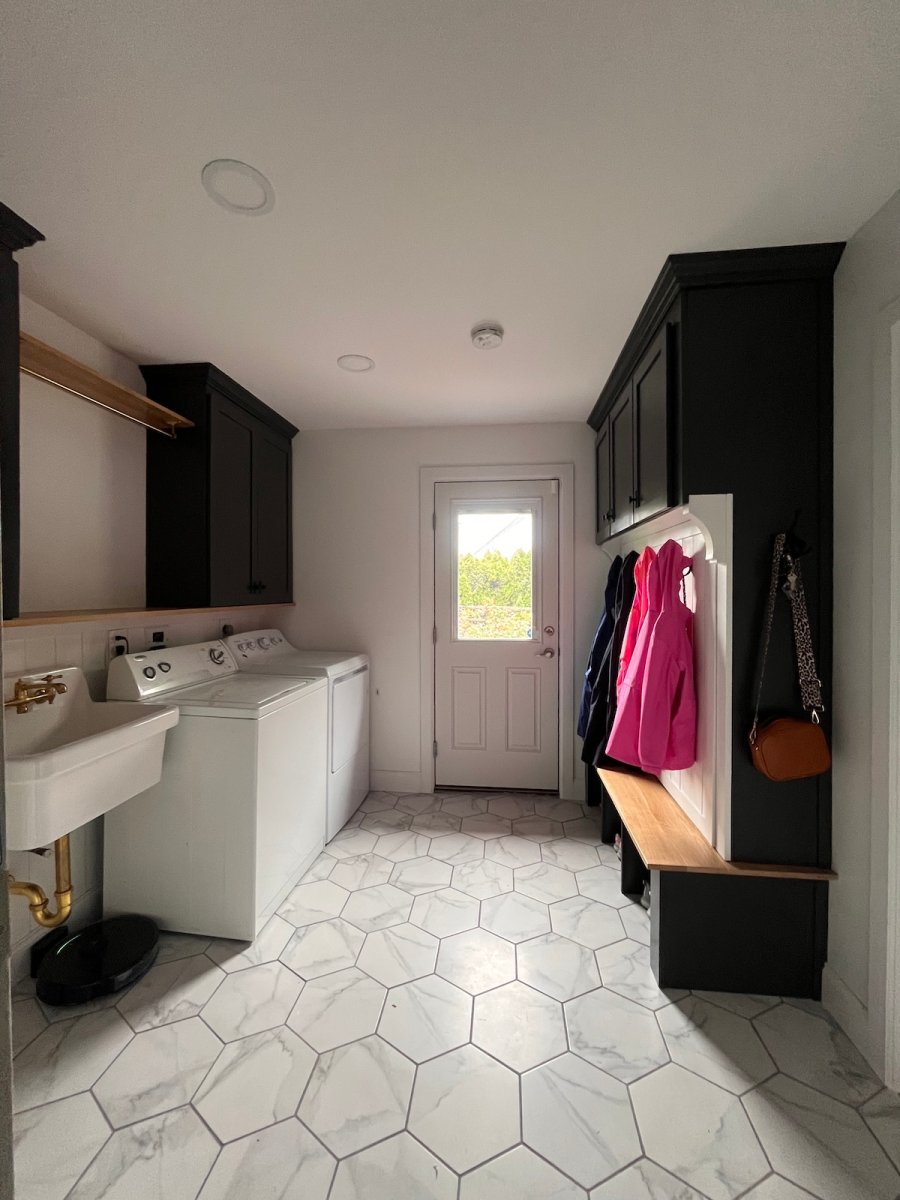
No home improvement project is an island. Well, unless your goals are to have an amazing TikTok or Instagram account and the day-to-day existence of a home life is less of a priority. But, here we are living in the real world where the storage cabinet Brian designed is part of a larger space, the laundry room. “I wanted to tie the project into the living room,” says Brian. “I ran a white vertical shiplap high chair rail behind the washer and dryer with charcoal cabinets, white oak shelves, and brass accents.”
According to Brian, for this project, both design and functionality were top of mind. “The shiplap made for an incredible hidden door. The white oak bench top and shelves were matched to a tree down the street from my shop and the dark gray color matched the color of an old building I worked in. The brass accents helped warm the room and allowed me to use the hook as a layer in front of the coat closet.”
When designing your project, keep in mind that the room you’re working on should feel like it “belongs” to the overall design of your home. For example, the trim used in your new project should carry or match the trim in the next space. Paint colors will either complement or clash with adjacent space colors. If you’re just updating the space, the floor needs a transition strip. Thinking about how the current project relates to other aspects of the home.
Get the right tools for the job.
If you want a successful project, using the right tools is essential. Just because an oscillating multitool can cut sheet material doesn’t mean it’s the right tool. Unless you’ve been practicing diligently for a long time, it’s best to choose a track saw or table saw for cutting sheet materials. Remember that round blades cut straight.
For this project, Brian says, “I used a mix of tools from my shop. “But even before I had a shop, I’m confident in saying that if you have a table saw, a track saw, or even a circular saw, you can do it.” Check out our guides to buying tools to find the right ones for your home projects.

Create a prototype.
Drawings are an inexpensive way to determine the size, shape, and details of a project. Whether it’s on paper or in a computer, a drawing can provide an opportunity to communicate your ideas with your clients or loved ones and give them a chance to share their opinions. It’s hard to react to thoughts that are just floating around in your head.
But after your drawing is established, there’s the real world. It’s a well-known architect’s cue that says: Verify in the Field (VIF). That’s because the real world always delivers surprises, no matter how well you plan, measure, and detail your drawings. Consider building a prototype or full-scale specification of a project to see how it actually works in space.
“Always build a prototype and save yourself the headache and building materials,” says Brian. “I prototyped it, and through trial and error, tweeted it.
Try it out.
If you’re thinking about starting a project but hesitate, Brian says: “Yeah, just go for it. You’ll never learn if you don’t try.” However, I need to add: start small. If you’ve never used power tools, don’t go out building a deck or remodeling a bathroom this weekend. Maybe start by building a planter, or painting the inside of a linen closet. Choose projects that can be put aside and aren’t disruptive around the house so you can spend time building your skills and confidence.
And make sure you’ve allowed enough time and over budget if you need to. When trying something new, it’s best not to rush and be under financial pressure. And never start a project that needs to be done quickly for a big deadline, like hosting a wedding or family holiday party.

Meet the 2025 tools of the year