
Before you start
The use of appropriate tools is as important as it is, for long lasting functionality, the procurement of the right wood is essential for employment. Therefore, before you learn how to make shelfing of the wardrobe, it is a good idea to consider how the closet will be used. If you expect a home -made shelf medium to have heavy weight items, such as full tool boxes and tools, then it is better to invest in furniture grade plywood or even cherry wood.
However, if you are making closet shelves for lightweight items, such as children’s toys, board games, or similar items, then you can use particle board, pine, malamine, pieces wood, or MDF (medium density fiber board). Consider the exact purpose of your DIY customs closet, then buy the necessary materials before starting.

Step 1: Measure and mark the locations of the Clalate Installation.
To ensure that the shelves of your built -in cabinets are equally distance and according to your wishes, you will need to measure height for each of the shelf and mark the cloth places. Moreover, if you are installing both DIY wardrobe shelf and bars, the element of the closet stick in the height of the closet while measurement.
Generally, the shelf in a closet is applied to about 84 inches from the floor, the middle shelves are often kept at around 42 inches from the floor, and the bottom shelves start close to 6 to 7 inches from the floor to provide enough clearance for the shoes. In the middle of the shelf IT, it is recommended that they leave about 12 12 to 15 inches vertical space between the shelf.
However, you should adjust the basis of the fact that you are saving the shelf height to ensure that you have enough space. Once you know how you want to manage the shelves of your wardrobe, use tape measurements and pencils to mark the bottom cloth spots where you want to sit. Next, use the Stud Finder to find the roots behind the walls and mark the places of root.
Step 2: Cut the clutch in the appropriate size.
Measure the closet waist and side walls and use these measurements to determine the length of your 1 × 2 keys. Use a meter saw to cut matching cleaning of the closet and the width of the closet of the closet.
Keep in mind that the same looks of the same look, these clets should be flushed together, so you will need to calculate the position and size of the keys when measurement.
- Bit Joint: If you want to bit the keys in the corner of the previous wall, you should be almost an inch smaller than the depth of the closet to calculate the thickness of your side wall.
- Mitter Joint: As an alternative, some high wardrobe design companies will reduce the end of the cloth joints at 45 degrees angle so they fit together for a cleaner look.
It is also a good idea to put a coat of paint on the keys before prime and install this opportunity, instead of completing this step after being installed. However, you will still need to fill the fastener holes and paint another coat.

Step 3: Save the clutch on the waist and side walls.
It’s time to install them after you measure and cut the keys. Keep the keys in place according to your earlier marks, then use a level to check and make sure they are in place properly. When you are ready, use a 2 -inch wooden patch and a drill to strengthen the keys on the waist and side walls of your DIY wardrobe the shelfing unit. Make sure you run patches through safe -help CL keys and in studs.
Step 4: Measure and cut the shelf boards.
The ordinary wardrobe organization sets the wardrobe, which is about 12 inches to 16 inches deep in terms of purpose and space available. The 16 -inch depth shelf is usually better better to maximize storage in large cabinets, while 12 -inch depth shelf is more standard in size.
Determine how deep you want your shelf, then either buy the shelf board properly or cut them into the proper depth. Measure the wardrobe width and cut the shelf board length to match so that they can sit clean on the installed keys.
Step 5: Mount the shelf board.
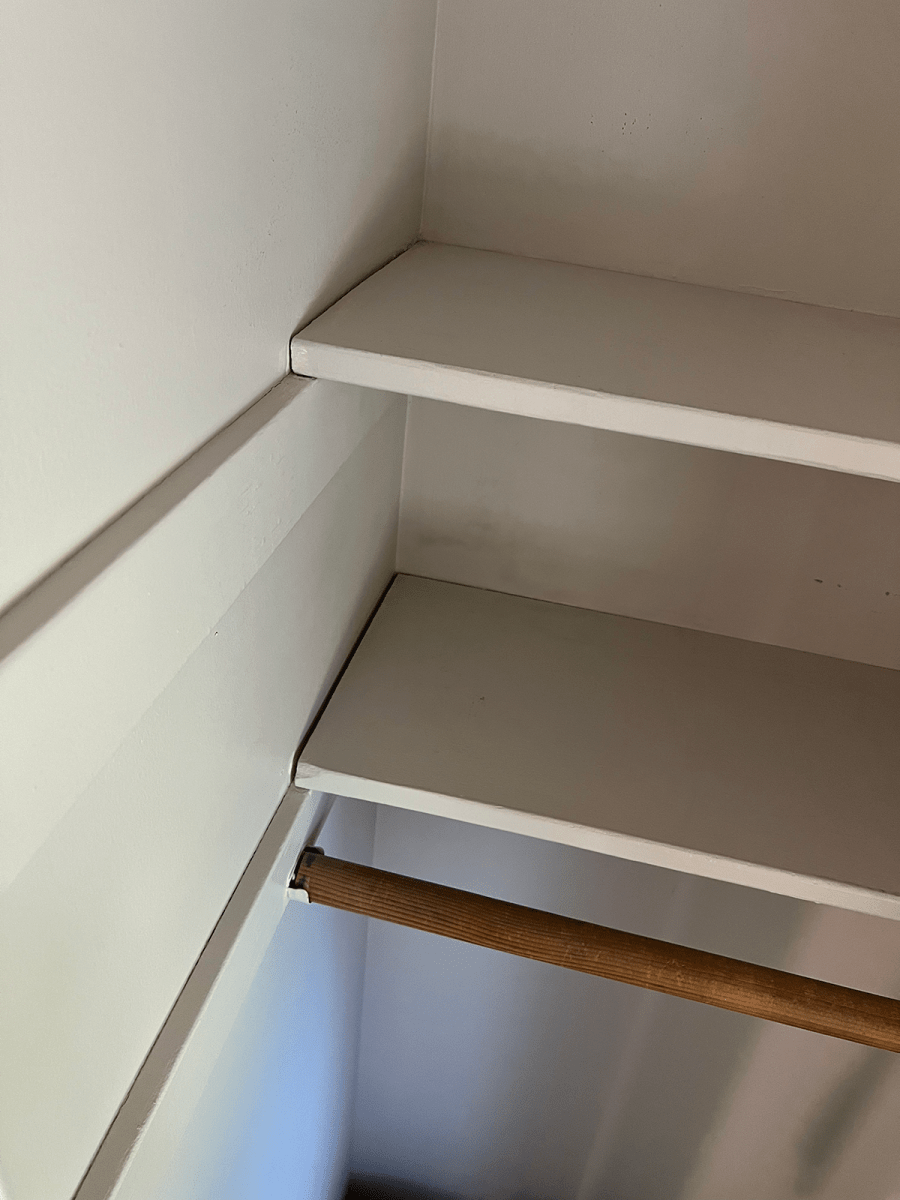
The last step is to install the shelf board. In most cases you can easily slide the shelf at an angle, then keep them down to rest on the bottom support. But, if you are worried about having a shelf shift, use the patch to tie the shelf into clusters. Just make sure that if you start with the lowest shelf, you are already saving the shelf up to the Clats so that the above shelf does not come in the way of drill.
The final views
DIY wardrobe’s shelf is relatively easy to ease and depends on your orientation, depending on measuring, cutting materials and installing these materials, can be completed in just two hours or less. Be sure to measure the mistakes at least twice before deducting any deduction and take time to make the proper planning of the closet setting so you can know what you are trying before you start.
It should also be noted that if you have a very wide wardrobe space, then you may need to apply additional additional wardrobe shelf brackets to help prevent any bow. Generally, when the non -collaborated period is more than 24 inches, apply extra brackets. However, if you follow the aforementioned stages, then you only need an extra bracket if the shelf is more than 36 inches long.
I was dead on a stone floor – even I saw these options