
Project Review
Time to work: 15 minutes
Tomorrow: 45 minutes
The level of skill: Preliminary
Estimated: $ 0 to $ 45
Before you start
Cleaning a faucet eartter is a basic task that nausea can handle dysfare. The key is to be careful when you work – you do not want to harm the Erroter or may not lose any piece of this fitting during discomfort or re -strengthening.
Keep a small bowl or container in the nearby to remove the parts after separating the earthen. It is also a good idea to put a towel or plug under the sink to prevent small pieces from falling into the drain.
How to clean the kitchen or bathroom sink faucet eartter
If you have never been able to get an Erroter before, you would like to take some pictures when you work to ensure that you keep the parts together in the correct order.
Step 1: Remove the Errot from the faucet.
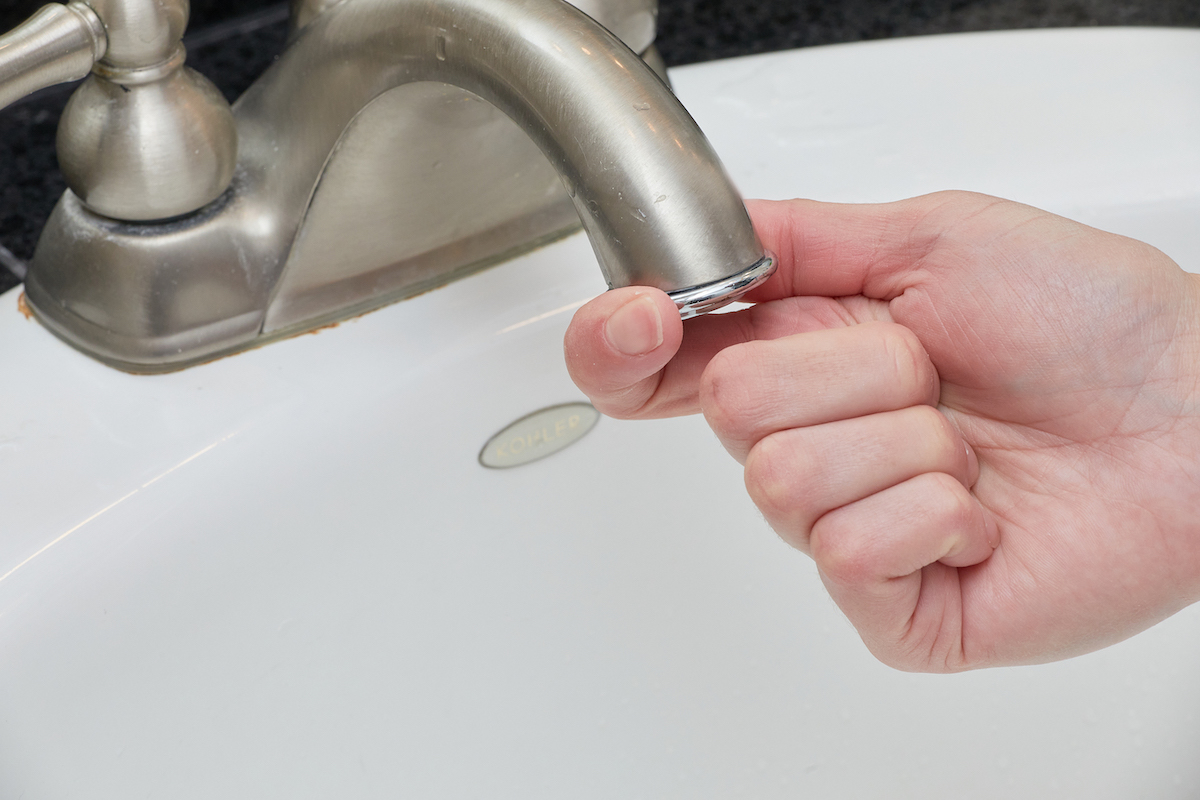
An Eriter will be connected to the end of your faucet. You can loose the Errier firmly and turn it in the direction of the clock. If you try to loosen it, the anerter does not move, use a couple of tongue and drains to grab the Ireter gently and bend it in the direction of the clock. Keep in mind that the metal metal teeth can damage the outer part of the airator if you put too much pressure.
With no damage, get a better grip on the Erroter, Put a strip of mask tape outside the earther. This layer of protection helps prevent the elimination of pliers.
If you can’t find an earthen, you may not be one in the tap or it may be hidden within the end of the faucet. You can remove a hidden irriter with a special tool known as the Twenty Errier key wrench.
If you are not able to remove the earthen from the faucet, the built of mineral collection may be caught by the Errot. You can still fill the vinegar by filling a small plastic bag and tieting the bag at the end of the faucet, sinking the eartire, cleaning the parts. After allowing Errot to be expelled, try to remove it again.
Step 2: Check the debris and separate the Erroter.
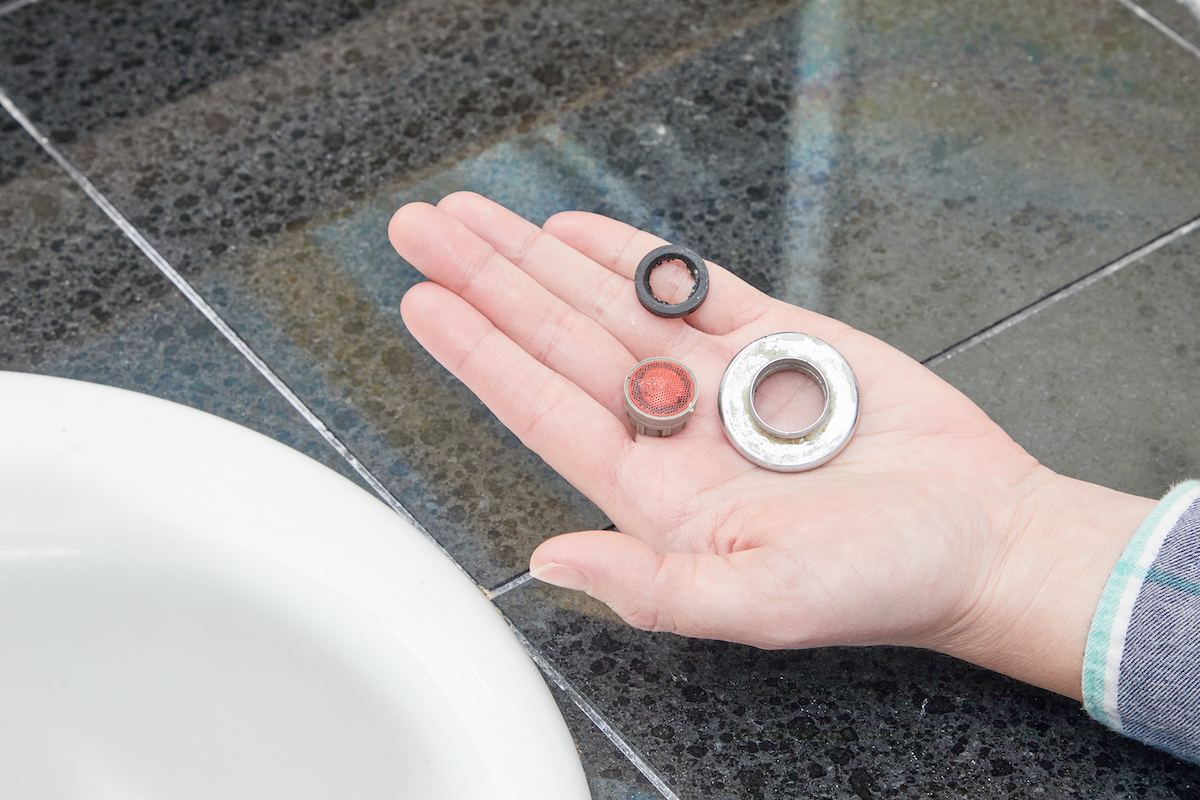
With the removal of the Errot, inspect the inside for a rigorous debris or built -ups that can tie the parts together. Use your finger or a small screwdriver to slow down any mineral deposits to free the Errot’s pieces. Once you are released, you can separate the Errot, when you take pictures when you separate the parts to ensure that they are re -assembled in the correct order. Place the sections in a safe place to avoid losing them.
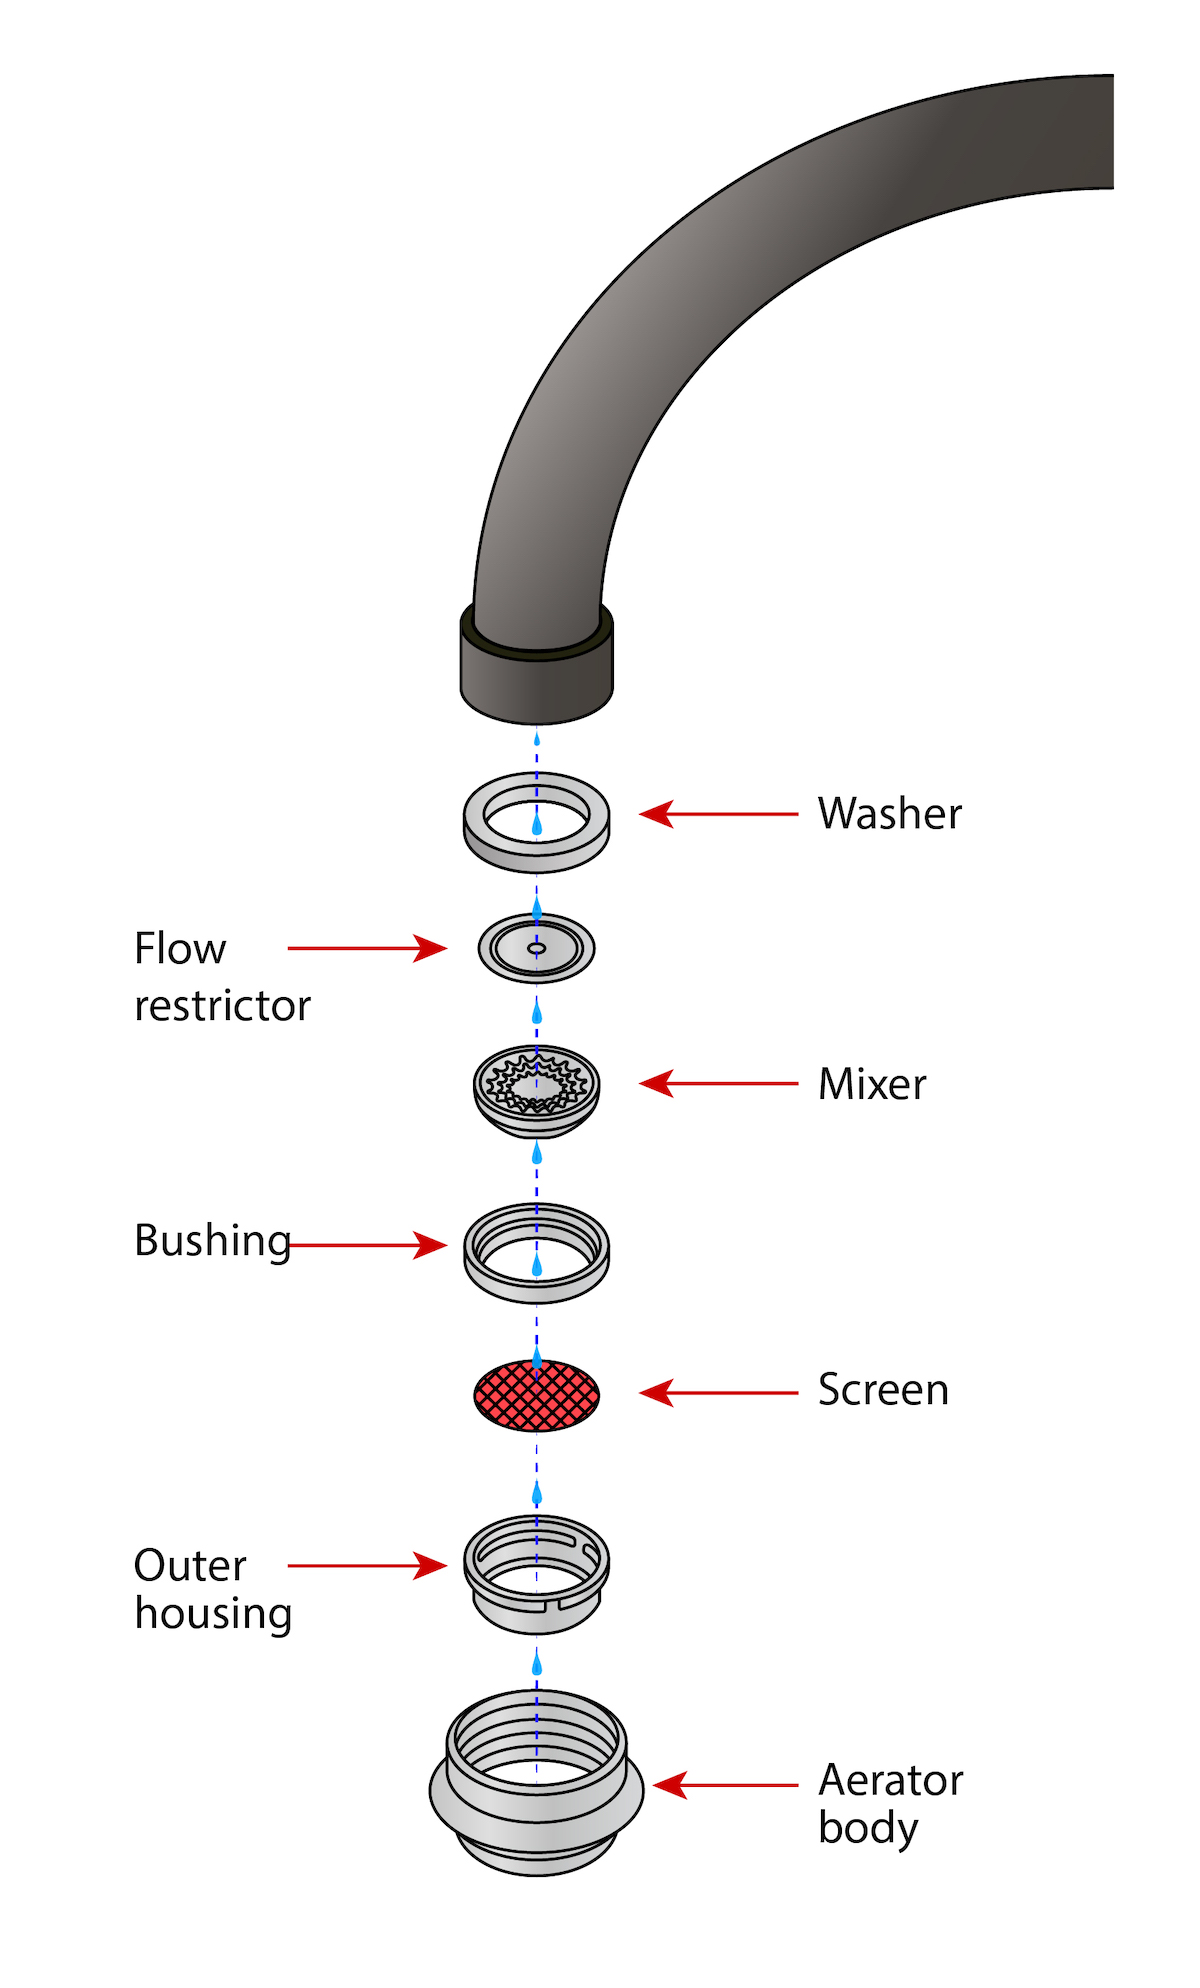
The faucets contain several parts that sit inside the body of the metal, including exterior housing, screen, bush, mixer, flu resector and washer. The toothpaste or similar small and thin item can help to separate the pieces of the anterior and prevent any debris trapped in the threads or prevent holes in the screen.
Step 3: Rinse loose remains and soak the Errot in vinegar.

Carefully rinse and inspect each piece of anter for significant damage symptoms. If the internal pieces of the Errot are damaged, then it is recommended to completely change this fitting. An easy cleaning will not restore its proper flow or function. Some will not be able to rinse with pieces of debris and grim ears. Instead, you should move forward as if you are learning how to clean the faucet head.
Prepare a cup with a white vinegar enough of the Errot pieces so that it is completely sinking. Place the Errot’s pieces in the container and allow the vinegar to break the tough seizures in the next 20 to 30 minutes.
Step 4: Clean the earthen with a toothbrush.
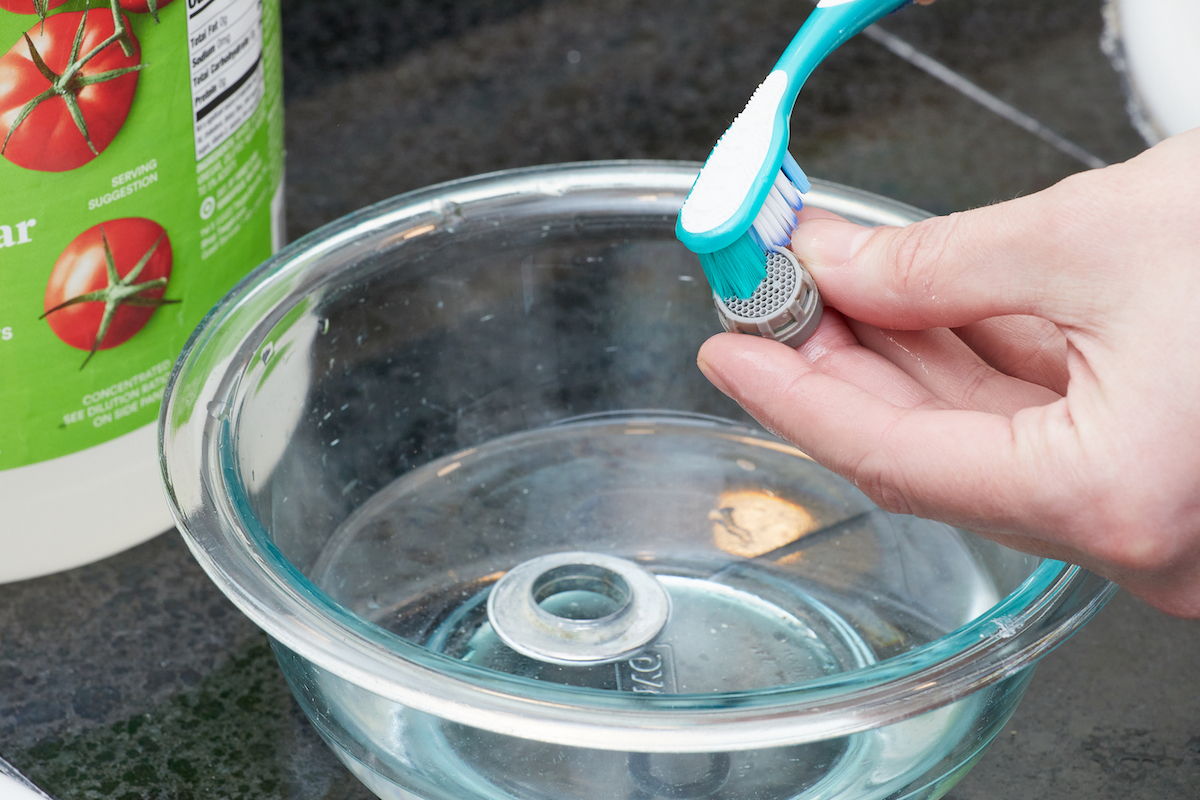
After removing the parts of the vinegar in the vinegar, most gram and mineral construction should be eliminated, but to ensure that the fitting is completely clean, you can use the old toothbrush to clean the individual parts.
In the bathroom to inspect the parts of any residual debris, the screen and the mixer hold the mixer. The hard brushes of the toothbrush can enter small holes and rotations, which can cause them to break any surviving pieces. Work slowly to avoid damaging parts.
Step 5: Rinse, re -deposit, and reinstall the Erroter.

Carefully run the faucet to rinse each part of the eartter before re -connecting this fitting. Use the images you have taken during the restraint to ensure that the parts are in the right order. With the re -accumulation, you can reinstall it on the faucet.
Use your hands carefully to thunder the eartter at the end of the faucet, turning the clock direction to tighten the fitting. Activate the water to test the flow of water. You may only need to tighten the earthen by hand, but if someone goes out of the water spraying or fitting aspect, use the wrench to tighten the earthen.
The final views
Cleaning a faucet anler is a simple, cheap task that you can usually complete in less than an hour, which is a huge incentive to deal with it soon. Make sure to check and clean the Errot at least twice a year to help prevent mineral reserves from constructing. If work is being done on a plumbing system or neighborhood water lines, you may need to clean the eartter more often.
During the inspection and cleaning process, you may face broken or wearing parts. If this is the case, it is time for you to change the Erroter for your faucet. Trying to use broken fitting causes only more problems. A new Twenty -two is not expensive. Make sure to take the old with you when looking for synchronous alternatives.

A dear leader to take the floor’s place