
Before you start
Like any hard plaque floor, the venil plaque floor can shrink and flow with changes in moisture. Take the vinyl plate floor out of the box and keep it in the room where you plan to install at least 2 days before installation to give time to meet room temperature and moisture. Failure to do this can cause them to become a gap between the plates, or cause the plates to be attached.
Guide to Install the Vaniel Plant Floor

Vinyl plates require some special tools and techniques to install the floor, this is a DIY friendly work. The following steps and tips will help you successfully complete the project.
Step 1: Inspect the floor, and repair if necessary.
If you are installing the Vaniel Planck Floor on the floor of the wood or concrete, first make sure the floor is flat, flat and smooth. Otherwise you can end with the flaws visible in the new floor.
- Find any flaws on a subfloour of wood or concrete using coarse 40 to 60 gut sandpapers. The use of sandpapers is specially designed for concrete or wood, depending on how you are working with all the floor.
- If the loss is more wide, you will need to be repaired. For concrete, fill the cracks using concrete patches. Surface depression using surface pressure.
- If you are laying a venil plate floor on the floor of the wood, you will need to change any damaged parts of the floor before you lay the new floor.
- Mark a section that includes a damaged area and is supported by floor joists from all sides.
- Cut the damaged area using a circular saw, arranged the saw in a deep way that you do not cut into joists.
- Present the damaged part with the PRY bar and replace it with a new piece of all floor.
Step 2: Remove the baseboards.
Score the Caulk line of baseboards with a utility knife, and then insert a pot knife behind the baseboard. Tap the knife with a hammer to slowly pull the baseboard below the wall. Next, a fair bar slip behind the baseboard to remove the baseboard from the wall.
When you work with each wall length, be careful not to damage the trim, if you plan to reinstall the baseboards after installing the Vaniel Planck Floor.
Pro Tip: When you remove it, make the number of every baseboard, so you know where they all go when they are time to reinstall them.
Step 3: Install a new underline if necessary.
If the underlined floor you are installed is not under it, you will have to keep an underdog role. (You will have some good options for the best underlexes for the Vaniel Planck Floor in our guide.) Remember that the peel and stick floors do not need underline.
- Start against one wall and remove the Andelates from the other. Use a utility knife to cut the Indailimant, cut the hole on the floor for vents or other obstacles on the floor.
- Compared to the first strip, roll the next strip of the underlines. Keep in mind that not overlaps the seventions. Instead, tap the suture with an underline or house wrapped tape.
- Continue every strip of underage until you cover the entire destination.
Step 4: Measure the room.
Before you lay the vinyl plaque, you need to measure the room to ensure that when you reach the opposing wall, the floor does not end with the small silver to install.
Which direction do you choose to run the floor, then measure the length of the room that stands for the floor direction? Divide this measurement with the width of a venue plaque.
For example, if the room is 107 inches tall, and the vinyl floor is 5.5 inches wide, divide 107 by 5.5 inches: 107 / 5.5 = 19.45 inches.
The amount in your calculation represents how wide the final plaque (in the percentage) on the other side of the room. To ensure that it is not less than 2 inches, it is not less than 2 inches.
The decimal price (.45) represents 45 % of the 5.5 inches, which is about 2.5 2.5 inches (5.5 x .45), which is a reasonable width for the last row of plates.
If the width is less than 2 inches, cut the first plate slightly to get the wider last row.
Step 5: Set the first plaque.
In the corner of the room, start setting the drain plate in the first tongue of the venil floor so that the edge of the groove is off the wall. Use the floor sparrows to create a 1/4 -inch distance between the wall and the plaque to allow extension.
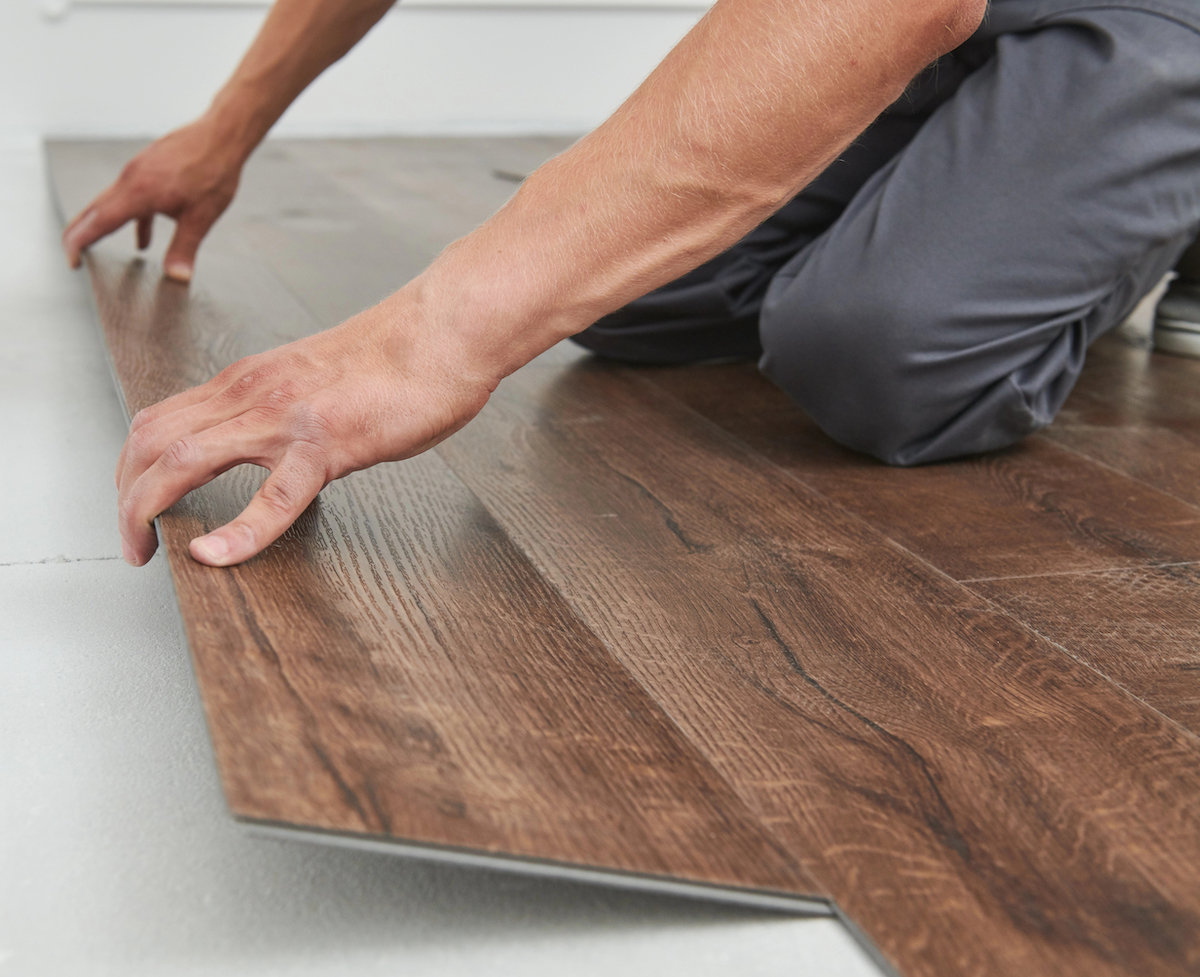
Step 6: Install the first row of the Vaniel Plant floor.
Click Lock Vainial Planck for floor, By lifting the second board at another angle and connecting the tongue with a drain first in the plaque. Leave the other plate to the floor to lock them together, then use the taping block and mallets safely tap each piece. Use spasers when you maintain a 1/4 inch buffer between the wall and the floor. Continue snipping plates together until you reach the end of the row.
For peel and stick vaniel palink floor, Remove the backing and hold the plaque so that only the shores are touching the previous row. Adjust its positioning before laying the plaque flat and pressing it in place. Use a roller to flatten the adhesive against the substrate.
Pro Tip: The venue plaque is often samples repeating on the plates. Before installing the floor, set the plaques by pattern. When you install the floor, rotate through each plaque sample to avoid ending with the same plate.
Step 7: Install additional rows.
Cut a plaque in length that is at least 6 inches smaller than the first board, scoring it and hitting it, or using a circular saw or meter saw. By cutting the first board in the second row, you will stir the seventes between each row, and create a more natural form.
In the second row, start the second row by connecting the first plaque long suture to the first open seam in the first row, closing them firmly using the taping block and mallet. Use tape measurements or scripts for ventures, pipes, toilet drains and other obstacles to measure and cut the tape measurements or scripts.
As soon as you start each row, make sure the seventions collide. When you have done all the work, the suture should neither be kept in line nor should be the perfect model like a brick wall.
Pro Tip: Place the floor off kits, so you can use them to start or eliminate rows. The use of different lengths helps to reduce the garbage by making a surprised suture.
The final views
Install Vaniel plaque is the floor of the floor, but this is a straightforward way to make a significant impact on the room. As long as the sub -floor below is in good shape, the Vaniel plaque floor can provide a fresh and luxurious feeling for any place. By following the aforementioned steps and points, diyers can install any kind of vinyl plaque flooring.
Normal questionnaire
It depends on the size of the room and the current floor condition, but most of the vinyl plaque floor projects take less than a day. Once the first course takes place, the workflow increases and Diyers can quickly cover the ground.
Yes, it is possible to paint a vinyl floor. Removing the sparkling finish from the top, then the floor with latex paint should provide a suitable substrate for latex paint. Make sure to coat the product manufactured with just a clear, durable seal.
When you install the floor floor, whether it be vigilant or wood, there are three rules to consider.
First of all, you can follow the flow of the halls and the plaque in the integrated room to prevent the spaces from being cut off.
Second, for the walls facing the south (in the northern hemisphere), it is understandable to install the plates from the north to south, as the rays of the sun from the windows can complete the structure.
Finally, if none of these scenario is applied, install the plates along the long walls.
Valentine floor products are much better than before. Today’s products are less at risk of warping, distribution, separation or wear than the products made 25 years ago. However, inappropriate installations or poor sub -sub -sub -reservoirs of poor quality can still cause these problems.
There is a risk of separating old peels and stick floors due to more humidity, poor installation, poor sub -reserves and age. The new vinyl plaque floor can be separated with high heat or cold, which causes the plates to expand or treat.

DIY floor solutions that look practically professional